In one of the projects customer asked to make a realistic animation of Christmas balls which to be started to swing being touched by the mouse. That’s what came out of it.
There many strange solutions on it. It seems that the authors simply did not understand how and when the shortcode [embed] works. Here is the simple code which can be added to functions.php.
The question often arises: how to count downloads and hide the real link to the file?
To solve the task we need to two things: intercept a click on the link and send the real file to the user by php.
What happens by the click on the fictitious link, pointing to an non-existent page? WordPress inits own core and tries to show 404 page. At this moment, we need to intervene by our function, update download counter, and send the real file. Here is code of such a function:
The new editor called Gutenberg is here as plugin in 4.9, and as core functionality called Block Editor, in 5.0. Regarding to it, it is often needed to determine programmatically which editor is used to edit post or page in the site console.
There are several variants:
- WordPress 4.9, Gutenberg plugin is not active
- WordPress 4.9, Gutenberg plugin is active
- WordPress 5.0, Block Editor by default
- WordPress 5.0, Classic Editor plugin is active
- WordPress 5.0, Classic Editor plugin is active, but in site console in “Settings > Writing” the option “Use the Block editor by default…” is selected
All the mentioned variants can be processed by the following code:
New version 2.0.0 of the plugin WOOF by Category is published. Now plugin is compatible with WPML.
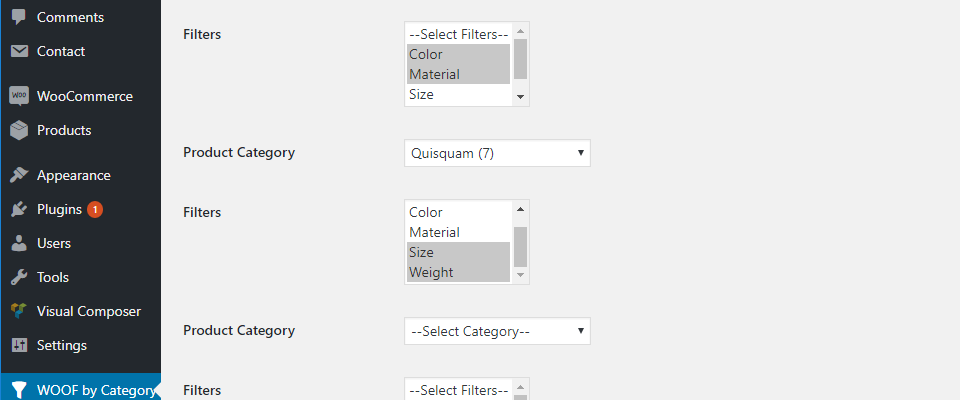
WOOF by Category is a WooCommerce Product Filter (WOOF) extension, which allows user to set up different WOOF filters in different categories. Plugin has options page on the backend, to setup relationships between any WooCommerce product category and any set of WOOF filters. Only selected filters will be shown on the selected category page and its children.
In the new version of the plugin, settings are saved separately for each WPML language. This allows to have different sets of pairs “category->filters” in different languages, and work with categories, translated by WooCommerce Multilingual (this plugin is a part of WPML).
xDebug is great development tool, but is slows down a web site significantly. During development cycle, it is desirable to turn on xDebug only when it is really needed. Let us show how to turn xDebug on, off, and set profiling modes in Laragon development environment. Also, we will show how to add buttons for these actions to phpStorm toolbar.
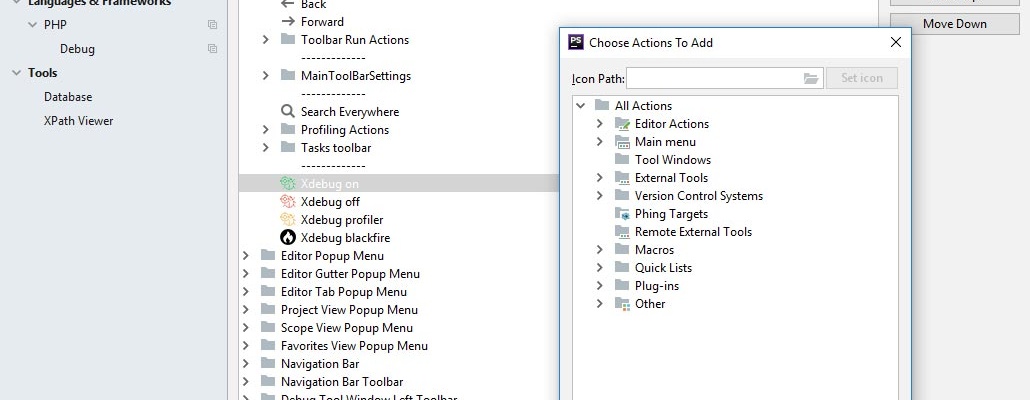
This is what final result will be (4 rightmost buttons).

First, let us create a command file to switch xDebug. We assume that we work on Windows 10 with Linux Bash Shell installed. In some folder, which is in Windows PATH, let us create two files: xdebug.bat and xdebug.sh.
Our company got a new status: “Certified WPML contractor”. This is an international mark of quality of our web sites, developed on WordPress with the WPML internationalization plugin.
According to W3C survey, WordPress is used on 30% of all web sites in Internet. Many of them have content in several languages. Most widely used is WPML internationalization plugin, developed and supported by OnTheGoSystems.
In January, 2018 the OnTheGoSystems created the contractors club. This club joined approved by OnTheGoSystems freelancers and companies, who actively use WPML. Now there are 189 approved contractors in the club.
Finally, in March, clubs members received invitations to pass certification. At this moment, in the beginning of April, 2018, only 5 contractors, including KAGG Design, passed the certification process.
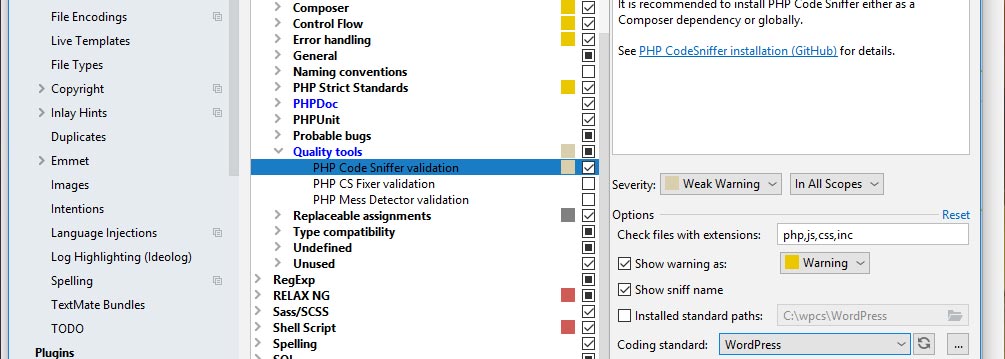
Code analysers as PHP Code Sniffer, and coding standards as WordPress Coding Standards, allow to create a modern, easily maintainable code, and avoid multiple errors even during writing of the code. They are indispensable for team development of a project. These tools are embedded into PhpStorm – modern powerful Integrated Development Environment (IDE).
At the same, many novice developers have troubles installing PHP Code Sniffer analyser and WordPress Coding Standards in PhpStorm on Windows. Information is dispersed by many articles in the Internet.
Below, we will join information on it in one place and show installation sequence step by step.
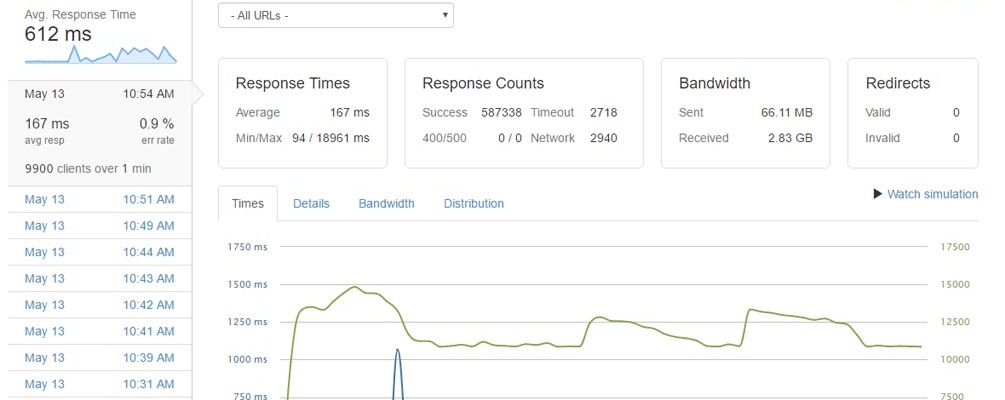
Is it possible to “squeeze out” a high performance from a WordPress site? Our answer is yes! In this article, we show how to set up a WordPress site configured to sustain high loads up to 10,000 clients per second, which equates to 800 million visits a day.
First, we need our own virtual private server (VPS). For testing we used a VPS leased from DigitalOcean (monthly rate USD 20) with the following parameters: 2GB of memory, 2 processors, 40GB on SSD. CentOS Linux release 7.3 has been chosen as the operating system.
The text below is almost a step-by-step instruction for experienced administrators. We will provide here only those parameters, which differs from default ones, and increase server performance. So, go ahead!
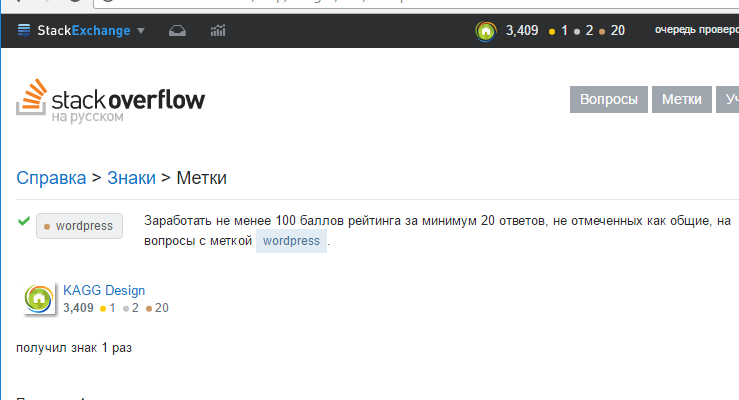
Our account is the onle one who received WordPress badge in Russian StackOverflow: http://ru.stackoverflow.com/help/badges/226/wordpress


